Eclipse Modeling Framework (EMF) is among the many frameworks of Eclipse ecosystem, the one that allows us to model the so-called application domain of your application, which is the set of entities, their attributes and their relationships. In this tutorial we will see how to use EMF to create the Model of an application.
Before proceeding make sure you have a version of Eclipse with everything you need. This article was written using version Eclipse Juno Modeling.
The Library model we will use as a sample is taken from the official EMF Tutorial : it consists of the entities Author, Book and Library.
For the purposes of this tutorial the model has been simplified to this:
– Author: has a String attribute name
– Book: has a String attribute title and an author attribute of type Author
– Library: has a collection of Author objects and one of Book objects
Ok, let’s start Creating a New (File->New->Other…) Empty EMF Project
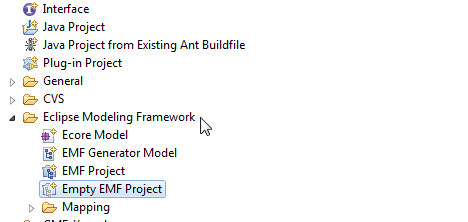
give it a name (e.g. com.rcpvision.rcptutorial.model), click Finish and you obtain a new project ready to host our EMF model.
Expand the project, select the folder model and create inside it a diagram EMF, by right clicking New-> Other-> Ecore Tools-> Ecore Diagram
then press Next, change (you should read “Create Ecore Diagram” at the top of the dialog box) the value of the File name field into “Library.ecore_diagram”, press Next.
At next step (you should read “Create Ecore Domain Model” at the top of the dialog box), leave the pre-set value (should be “Library.ecore”) into the File name field and press Finish.
We now have a blank canvas where we can literally design our model.
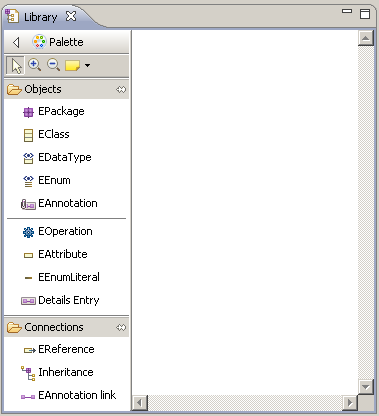 While editing the opened .ecorediag file, the correspending .ecore file will be kept in synch.
Please note that the .ecore file is the main EMF domain file and that we could have started editing that file.
In this tutorial instead we decided to explore the Ecore Dialog Tools and have the .ecore file automatically generated and synchronized with the diagram.
so let’s start by clicking an EClass object on the Palette and clicking again on the blank page (sort of Drag&Drop) and rename it as Author

then move the cursor over the box and select the icon correspondent to the action “Add EAttribute“
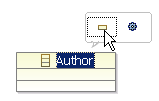
and rename the attribute as name

then right-click the name attribute and select Show Properties View
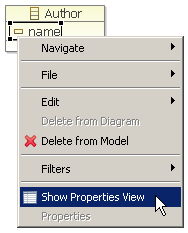
go to the Properties View, click the button to the right of the field Etype
select EString and click OK button
in order to have the following situation in the Properties View.
Let’s do the same for the entity Book and its String attribute title.

Now, in order to add to the Book entity a reference attribute to Author, click on the EReference icon on the Palette
then click on the Book entity

and release the mouse button over the Author entity
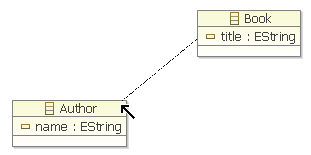
rename the reference as author

Please note that we have just created an Author type attribute called author in the Book class with cardinality 0..1 (not required).
If now we save the .ecorediag file and open the .ecore file, we’ll see this
We’re not done with the model however. We need to create an entity Library capable of managing a list of Author and one of Books. Let’s return to the diagram and then create an EClass named Library.
Then create in Library a reference to Author (click EReference, then click on Library, drag the cursor and release it on Author), calling the link listAuthor. If we stop now we would have only added in Library a reference, at most, to a single Author. Instead the reference is a multiple one (a Library contains a collection of Author objects), then insert “*” (or “-1” in Upper Bound field).
In fact we can put a whole number to indicate the maximum number of Author elements; in any case if the number is greater than 1 this attribute will be managed as a list, else as single attribute.
Finally you must be marked this collection as “Is Containment“
What does it mean? It means that the life cycle of the collection (the list of Author) is related to the lifecycle of the object Libray, namely that the existence of this list is subject to the existence of the “container” Library.
So let’s do the same thing with Book
Now the file .ecore looks like this
You may prefer managing an EMF Model directly via this .ecore file editing (you can find an example Eclipse RCP: how to create and persist an EMF Model), it’s just a matter of taste.
The important thing is that now you have an Ecore Model ready to go. Yes, go, but where? The answer is: to generate the model source.
Until now in fact we did not write a single line of code, but we know we will need it at some point.
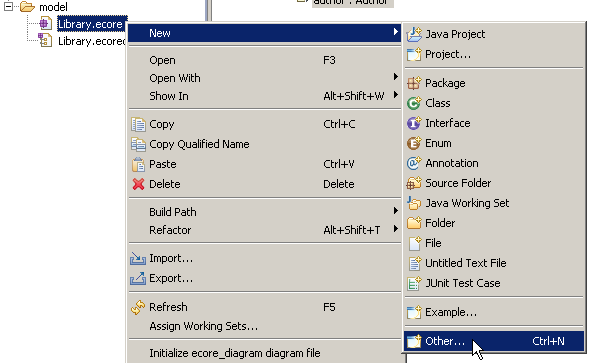
For this purpose select the .ecore file, right-click New->Other…,
select EMF Generator Model
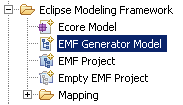
click Next button
click Next button again
and again (selecting Ecore model)
now click the Load button, then Next
and Finish.
In the end we obtained a Genmodel file:
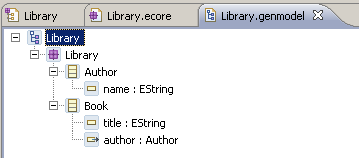
from which we can quite “magically” generate the Model code, simply by right-clicking and selecting Generate Model Code
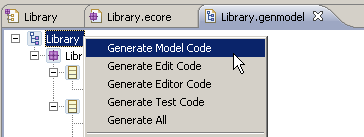
and … here is the Model code, written out for you by EMF!
Take some time looking at the generated code and ask yourself how much time it would have taken to you to create it by hand (please consider that it embeds, among other features, a notification mechanism associated to each setter method, just to mention one).
Now let’s see how is EMF effective when it comes to maintain a Model, that is, when we need to change the Model.
To do so, let’s imagine we, all of a sudden, realize that a Book can have more than one Author! Oh, well, we need a Collection instead of a single flat attribute!
Wait, we’ve got EMF! Then you simply do this: select the author reference from Book to Author and change the Upper Bound value from 1 to * (unlimited)
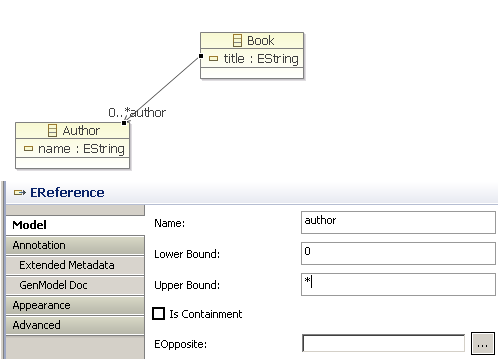
now save, re-open the Genmodel file, do again right-click on the root of the tree and select Generate Model Code

to get the Model code updated.
Conclusions
What are then the advantages with the introduction of EMF?
- the Model can be designed by non-developer people (maybe the analysts, which probably have a deep knowlegde of the Customer Domain Model gained through decades, but know almost nothing about a single programming language, including Java)
- the Model code is being generated automatically at 0-time (that is: the time is spent in designing the Model)
- the Model code is created and maintained automatically, thus is potentially zero error-prone.

Complimenti,
spiegazioni semplici ed efficaci.
Hello Vincenzo,
I followed this tutorial to recreate a Library model. It works like a charm a charm – thanks for this detail tutorial. I persisted the model into MySQL database using the HibernateStore. When I looked into the generated schemas (i.e., table colums) inside the MySQL tables, there are so many colums in the table that I conisdered redundant. For example, the Book table contains the following shema:
e_id dtype | e_version | title | library_listbook_e_id | library_listbook_idx | econtainer_class | e_container | e_container_feature_name
The only useful colums are e_id and title. I don’t want the rest of the colums as it makes it difficult to manage the table colums (schemas) intuitively.
Can I use the hibernateProperties.setProperty(PersistenceOptions.PERSISTENCE_XML,
“annotations.xml”); to only generate the only colums (i.e., e_id and title) that are important and related to my model?
If I can use the setProperty, where do I actually place it in my library model project (in the src or model folder), how can I provide the location in the setProperty (is it “/my/emf/example/model/annotations.xml”) and how can I set the namespace-uri in this tag of the annotations.xml file?
Thank you so much!