Detecting objects in an image can be accomplished in a variety of ways, but among them YOLO (You Only Look Once) is by far the most easy and efficient one.
Since YOLO is based on deep learning and deep learning has two faces (training and testing/execution) you may be wondering which side of the coin we will focus on here.
Well, the process of training a neural network may be a complex task that requires time, powerful hardware (possibly GPU+Cuda), expertise in the specific field and a trial and error scientific approach.
Here instead we will see how to use a pre-trained YOLO network included into Deeplearning4j, the powerful open source Java library for deep learning that joined the Eclipse ecosystem in 2017.
Start creating a new Maven simple project with the following dependencies
		<dependency>
			<groupId>org.deeplearning4j</groupId>
			<artifactId>deeplearning4j-core</artifactId>
			<version>1.0.0-beta7</version>
		</dependency>
		<dependency>
			<groupId>org.deeplearning4j</groupId>
			<artifactId>deeplearning4j-zoo</artifactId>
			<version>1.0.0-beta7</version>
		</dependency>
		<dependency>
			<groupId>org.nd4j</groupId>
			<artifactId>nd4j-native-platform</artifactId>
			<version>1.0.0-beta7</version>
		</dependency>
Then create a new Java class with the following imports
package it.rcpvision.dl4j.yolo;

import java.awt.BasicStroke;
import java.awt.Color;
import java.awt.Graphics2D;
import java.awt.image.BufferedImage;
import java.io.File;
import java.io.IOException;
import java.util.List;

import javax.imageio.ImageIO;
import javax.swing.ImageIcon;
import javax.swing.JLabel;
import javax.swing.JOptionPane;

import org.datavec.image.loader.NativeImageLoader;
import org.deeplearning4j.nn.graph.ComputationGraph;
import org.deeplearning4j.nn.layers.objdetect.DetectedObject;
import org.deeplearning4j.nn.layers.objdetect.Yolo2OutputLayer;
import org.deeplearning4j.zoo.model.TinyYOLO;
import org.nd4j.linalg.api.ndarray.INDArray;
import org.nd4j.linalg.dataset.api.preprocessor.ImagePreProcessingScaler;

public class Dl4jTinyYoloDemo {
now define a String array that contains a label for each one of the 20 different objects detectable by the pre-trained YOLO network that we will use
	private static String[] labels = {"aeroplane","bicycle","bird","boat","bottle","bus","car","cat","chair","cow",
			"diningtable","dog","horse","motorbike","person","pottedplant","sheep","sofa","train","tvmonitor"};
then create the main method, where the TinyYOLO network included into deeplearning4j-zoo dependency is created and initialized
	public static void main(String[] args) throws Exception {
		ComputationGraph model = (ComputationGraph) TinyYOLO.builder().build().initPretrained();
		System.out.println(model.summary()); //Printing the neural network structure
		double dt =  0.4; // Detection threshold
		NativeImageLoader loader = new NativeImageLoader(416, 416, 3);
		ImagePreProcessingScaler imagePreProcessingScaler = new ImagePreProcessingScaler(0, 1);
		Yolo2OutputLayer outputLayer = (Yolo2OutputLayer) model.getOutputLayer(0);
printing the model.summary() is there just to show some details of the several layers of the network itself.
dt is the detection threshold, a double value between 0 and 1 that represents the probability level of the detections.
The other three variables will be used to
- load the image file that we will provide as input
- scale each pixel value into a 0..1 range
- and extract the results from the network
Here comes the real stuff: the object detection phase with a given image file
		long t0 = System.currentTimeMillis();
		File imageFile = new File("/home/vincenzo/Pictures/800px-Lex_Av_E_92_St_06.jpg");
		INDArray indArray = loader.asMatrix(imageFile);
		imagePreProcessingScaler.transform(indArray);
		INDArray results = model.outputSingle(indArray);
		List<DetectedObject> detectedObjects = outputLayer.getPredictedObjects(results, dt);
		long t1 = System.currentTimeMillis();
		System.out.println(detectedObjects.size() + " objects detected in "+(t1-t0)+" milliseconds");
In the above lines we are:
- loading and scaling an image file (remember to replace the path with a real path on your system)
- feeding the pre-trained YOLO neural network
- getting the detection results
- measuring and printing how many objects were detected and how fast was the detection phase
Ok, but can we be satisfied without seeing what the network has really detected with our own eyes? Of course not!
So let’s add and define a method that draws bounding boxes around the detected objects and print the label on each.
		drawDetectedObjects(imageFile, detectedObjects); //Drawing detected objects
	}

	private static void drawDetectedObjects(File imageFile, List<DetectedObject> detectedObjects) throws IOException {
		BufferedImage img = ImageIO.read(imageFile);
		Graphics2D g2d = img.createGraphics();
		g2d.setColor(Color.RED);
		g2d.setStroke(new BasicStroke(2));
		for (DetectedObject detectedObject : detectedObjects) {
			double x1 = detectedObject.getTopLeftXY()[0];
			double y1 = detectedObject.getTopLeftXY()[1];
			double x2 = detectedObject.getBottomRightXY()[0];
			double y2 = detectedObject.getBottomRightXY()[1];
			int xs1 = (int) ((x1 / 13.0 ) * (double) img.getWidth());
			int ys1 = (int) ((y1 / 13.0 ) * (double) img.getHeight());
			int xs2 = (int) ((x2 / 13.0 ) * (double) img.getWidth());
			int ys2 = (int) ((y2 / 13.0 ) * (double) img.getHeight());
			g2d.drawString(labels[detectedObject.getPredictedClass()], xs1+4, ys2-2);
			g2d.drawRect(xs1, ys1, xs2-xs1, ys2-ys1);
		}
		JLabel picLabel = new JLabel(new ImageIcon(img));
		JOptionPane.showMessageDialog(null, picLabel, "Image", JOptionPane.PLAIN_MESSAGE, null);
		g2d.dispose();
	}
}
It’s time to run it!
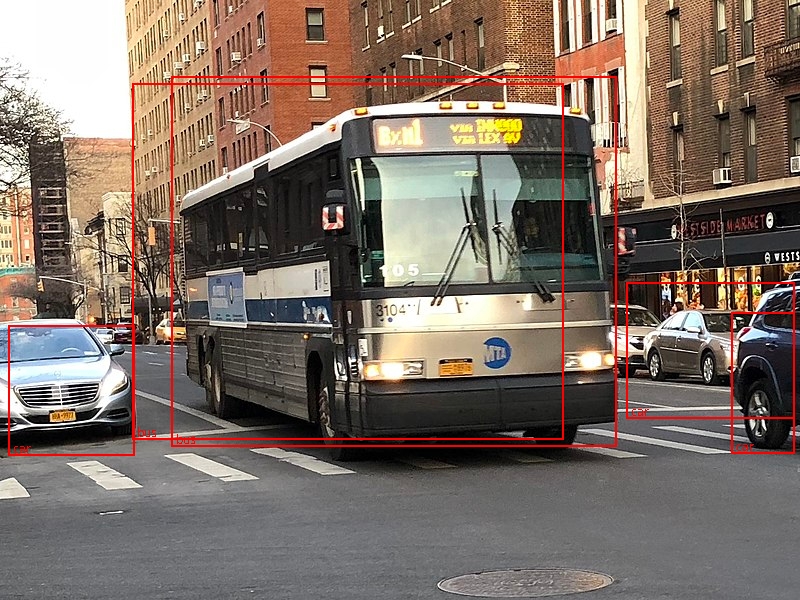
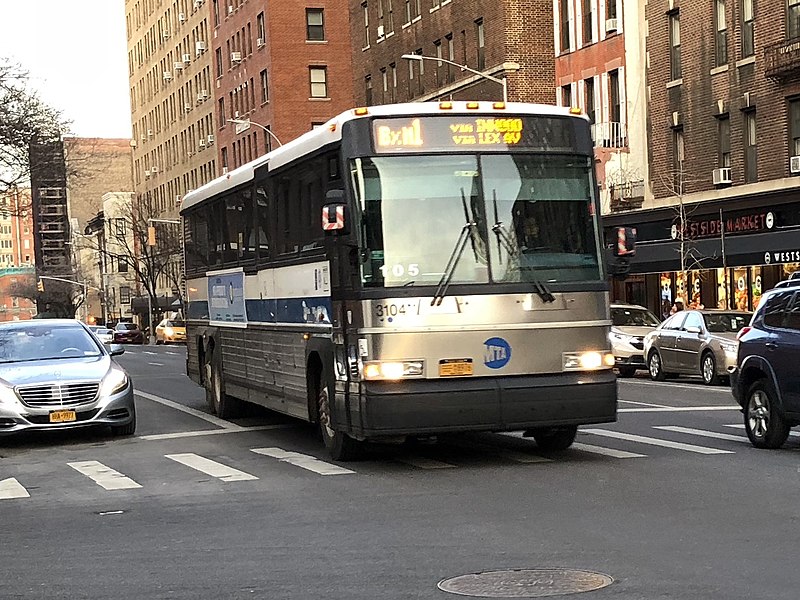
You choose an image; we’ll take this one, taken from https://commons.wikimedia.org/wiki/File:Lex_Av_E_92_St_06.jpg
(licensed under the Creative Commons Attribution-Share Alike 4.0 International license)
and as result we get this

in a fraction of a second:
5 objects detected in 283 milliseconds
Other techniques may then be applied in order to remove the overlapping detection and to improve the overall process, but we wanted to keep the code as simple and straightforward as possible.
Now try with your own images and remember that you may have to tune the dt (detection threshold) value for best results.
Where is the complete code?
Hi,
here is the code
https://github.com/vincenzocaselli/dl4j-ece2019/blob/master/it.rcpvision.dl4j.ece2019.workbench/src/main/java/it/rcpvision/dl4j/yolo/Dl4jTinyYoloDemo.java