Introduction
We’ve already wrote in the past about RAP framework (see article Single sourcing with Eclipse RAP). In the meantime however this framework has made big progress (the above article was referring to version 1.4, while now it is out with version 2.1) and many things changed. Also the name, RAP, does not mean Rich Ajax Platform anymore, but now stands for Remote Application Platform.
In practice it is now a platform to develop modular applications for desktop, browser and mobile.
In this article we will see how to prepare the needed environment for the creation of our first web application with RAP.
Preparing the environment for RAP
We will start with Eclipse Juno SR2 for RCP and RAP developers.
with a brand new workspace.
Now we’ll update the RAP Tools with the following update site:
http://download.eclipse.org/rt/rap/tools/2.1

and restart Eclipse at the end as usual.
So, our IDE is ready to go, but we need to define a RAP Target Platform.
In our previuos article we did it with Preferences -> Plug-in Development -> Target Platform. Now instead we will see a different way, which will allow us to Define a Target in an appropriate file; thil will give us more chances to import this definition into other workspaces or share a target definition among the members of a development team.
This definition file must be created into a Project, which may also be our application project itself (the one we are creating). However, since this is a design setting, we prefer to keep it separate from our application and therefore we will create a simple project for this: File -> New -> Project… and, inside category General just select Project.
Let’s give it a name, for example RAP-targets and press Finish.
Into this project, we then create a Target Definition (File -> New -> Target Definition)
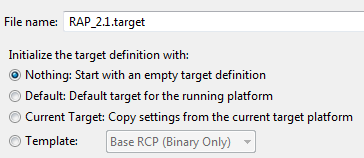
the Target Definition editor will then open.
In section Locations let’s press button Add… and add the following Software Site:
http://download.eclipse.org/rt/rap/2.1
paying attention to deselecting the flag Include required software
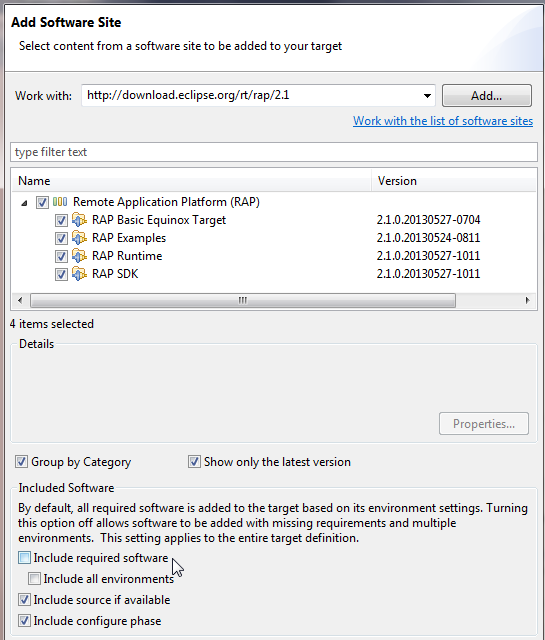
Then let’s save and wait the target resolution
![]()
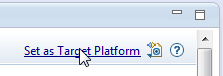
At the end let’s set the target itself
Creating our first RAP 2.1 application
Let’s go ahead with the creation of our RAP application in the following way:
File -> New -> Plug-in Project (yes, exactly as if we had to do for a classic RCP/desktop application). Give the plug-in a name, for instance it.rcpvision.rap.application, press Next, deselect flags “Generate an activator …” and “This plug-in will make contribution to the UI” and answer No to question “Would you like to create a rich client application?”. Then press Next, select template RAP Hello World and press Next. In the end we define an application title (e.g. “Orders manager”) and press Finish.
Now we can launch our application in one of the following alternative ways:

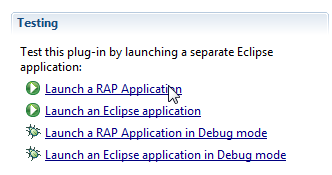
Note that in both ways we can choose to start in Run o in Debug mode.
Now the browser embedded into the IDE will open at address
http://127.0.0.1:57027/hello
(of course you may see another port) but you can open the same URL from any other browser of your choice.
Now let’s go to the sources and open class BasicEntryPoint.java, go to last line and insert the following code:
  button.addSelectionListener(new SelectionListener() {
			@Override
			public void widgetSelected(SelectionEvent e) {
				System.out.println("Button pressed!");
			}
			@Override
			public void widgetDefaultSelected(SelectionEvent e) {
			}
		});
put a breakpoint at row where there is System.out… and launch the application in Debug mode: we’ll see that we can debug the UI part of our web application.
Note: if at application startup you get an error in the IDE-embedded browser, press the Refresh icon.
Then if you want to use the full power of WindowBuilder in order to create your user interface, you can create a Composite SWT:
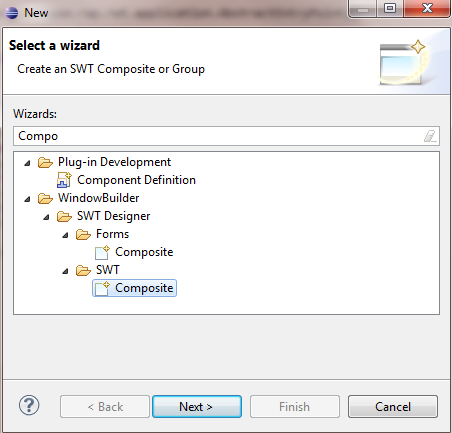

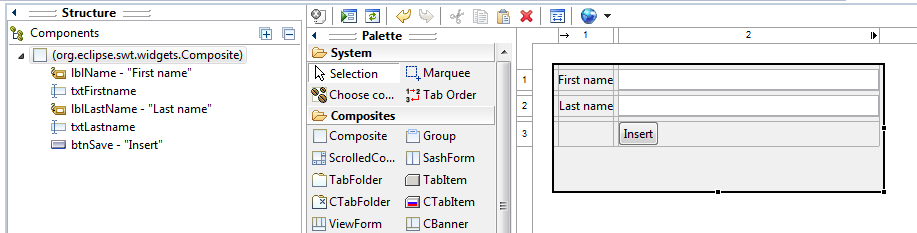
design your composite with WindowBuilder Designer
and then replace the content of method createContents() in BasicEntryPoint.java with the following, in order to use the composite we just made:
  @Override
    protected void createContents(Composite parent) {
    	parent.setLayout(new FillLayout());
    	new FirstComposite(parent, SWT.NONE);
    }
Now relaunch the application and you will see your user interface designed with WindowBuilder running

Leave A Comment