If I only could …
You work with a good professional workstation or laptop and would like to set it up for the maximum productivity and still have a gorgeous user experience?
You work in the machine or deep learning domain and would like to exploit the full GPU & Cuda power of your NVIDIA card?
You don’t want to wipe out your pre-installed Windows since occasionally you want to have the chance to get back to it, just because ‘you never know..’ ?
If your answer to these questions is yes then keep on reading: I’ll show you the way step by step.
The Powerful Couple
Indeed, in a previous article, I already told you about the powerful couple in the Linux arena: Arch as a distro and Deepin as a desktop environment. In that occasion I gave you the links to two very interesting ISOs for this: Manjaro Deepin and ArcolinuxB Deepin.
Well, things changed a little since then: Manjaro decided to stop (at least for now) maintaining the Deepin flavour, whereas Arcolinux is dedicating a great effort to its large number of flavours available, Deepin included.
So lately I decided to move from Manjaro Deepin (18.0.2, which I used for quite a while) to Arcolinux B Deepin.
However, if you prefer Manjaro, you can still start from one of its main flavours (e.g. KDE/Plasma) and then install deepin-session-ui.
One of the reasons that make me decide for Arcolinux is the quick and competent response that you have when you ask a question on their forums. This can make a world of difference when you use Linux at work and can give you great satisfaction in general.
Few steps
In this article I will show you how to:
- verify BIOS options for installing Linux without problems
- set up your pre-installed Windows for a smooth dual-boot experience
- select the right options when installing Linux in order to get a full power of GPU & Cuda
- set up a gorgeous and powerful Linux machine with ArcolinuxB Deepin
If you are not interested in dual boot and/or GPU power, you can just skip those parts and still get a wonderful machine
The steps showed here were applied to a Dell Precision 5530 laptop with 16 GB RAM and two video cards (Intel UHD Graphics 630 and NVIDIA Quadro P1000 Mobile), but should apply to any other harware situations.
BIOS
Before starting to install Linux it is advisable to check some BIOS options and change some of them when needed.
With a Dell laptop you normally enter the BIOS by hitting F2 once or twice at startup.
Once there, look for the following options (please consider that your BIOS may look very different, so just look for same items, regardlessly of how they are located with respect to the following images)
Secure Boot : disabled
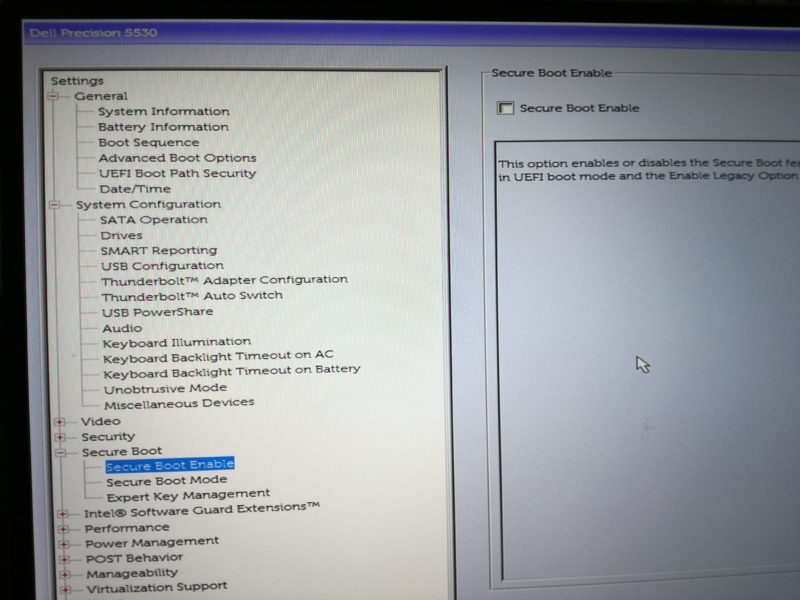
BIOS Secure Boot Disabled
SATA Operation : AHCI
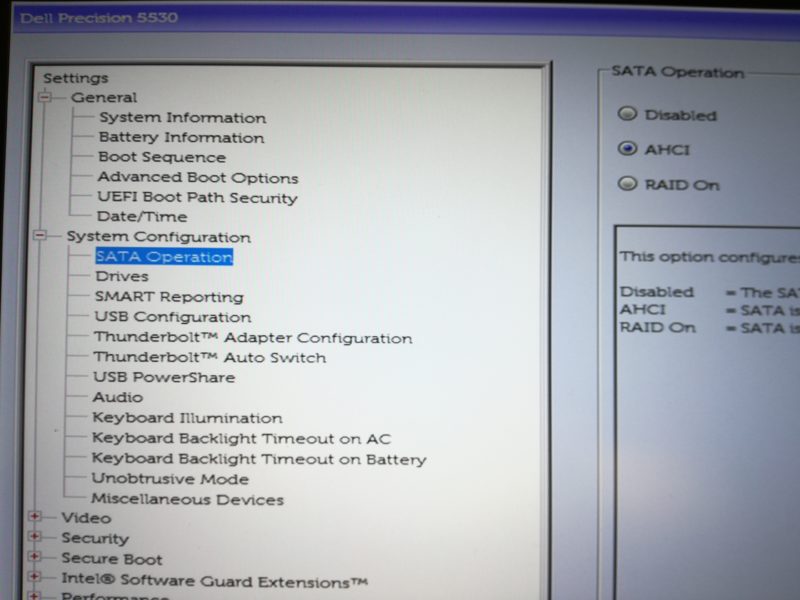
BIOS SATA Operation AHCI
Dual boot with Windows
Making room for Linux
If you have Windows pre-installed and you want to keep it, then you have to think how to manage your disk(s) partitions.
In my case I have a 256 GB SSD NVME where Windows came pre-installed and taking all the available space.
Then I entered Disk Management, right-clicking on Windows button
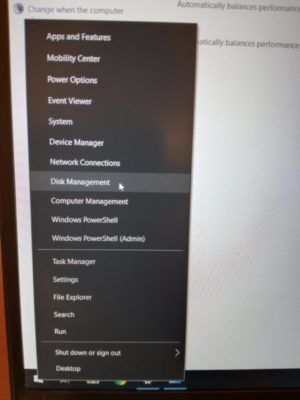
Windows Disk Management
and shrinked the main partition to about 60 GB. Due to the presence of other system partitions I was then able to get a free a space of around 174 GB.
You may decide for subdividing the space depending on your total available space and needs for Windows and Linux.
If the Windows shrinking process does not allow you to shrink space enough, you may try EaseUS Partition Master Free: it’s very powerful and easy to use, but keep in mind to leave some free space in the Windows partition, otherwise it will be difficult to work with it (consider that sooner or later you may have to cope with heavy Windows Updates that need enough free space to be performed).
Checking Disk Partition system
While in Disk Management it is worthwhile to check how your disk is partitioned. In fact you may have BIOS/MBR (the old way, but still available and present) or, most probably, UEFI/GPT (my case). In order to check this, you just select the disk, right-click Properties and check the Volumes tab, like this
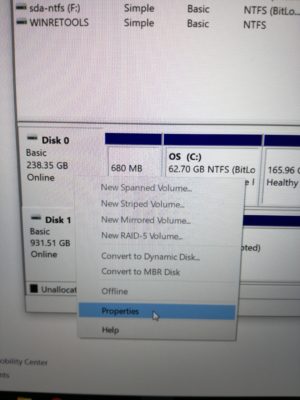
Windows Disk Management Properties

Windows verify GPT
While inside Disk Management check for EFI/UEFI partition (by checking Properties of each partition): just keep note of its size and location; it will be useful later, during the Linux installation phase.
Disabling some Windows options
While we are in Windows we need to uncheck some default options.
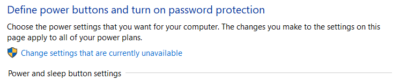
So let’s go to Power & Sleep settings
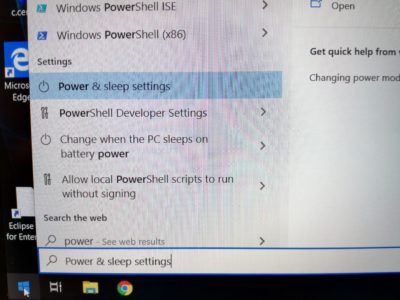
Windows Power & Sleep settings
follow the link Additional power settings
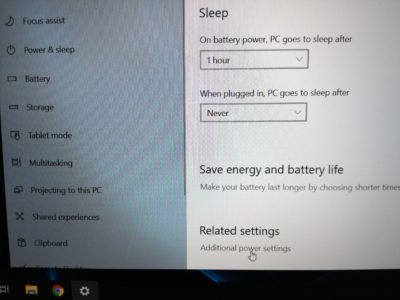
Windows Power & Sleep Advanced settings
then the link Choose what closing the lid does
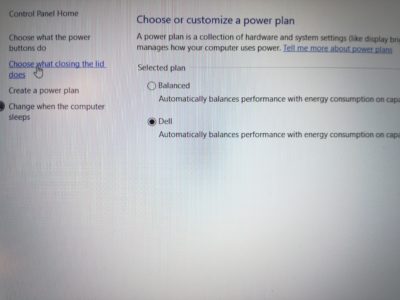
Windows Power & Sleep Advanced settings link
and click on Change settings that are currently unavailable
then ensure that both options Turn on fast startup and Hibernate are unchecked
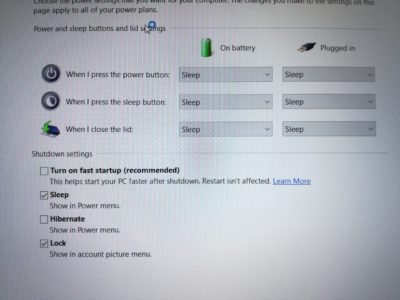
Disabling Fast Startup & Hibernate
Ok, we are almost done on the Windows side, but there is one more thing: if you plan to share some Windows partition with Linux (e.g. the mail Windows partition itself) chances are that they are BitLocker encrypted.
In order to check this, open a Command prompt (cmd) as Administrator and type the following command
manage-bde -status
if you see something like this
Volume C: [OS]
    Conversion Status:    Encryption in Progress
    Percentage Encrypted: 62.7%
then BitLocker Encryption is active.
You can easily turn it off with the command
manage-bde -off C:
that should give you this message as output
Decryption is now in progress.
manage-bde -status
Volume C: [OS]
    Conversion Status:    Fully Decrypted
    Percentage Encrypted: 0.0%
Ok, now with Windows we are done.
Got an NVIDIA video card?
If you have an NVIDIA video card then take into account that any Linux distribution will most probably install and use the Nouveau open source drivers instead of native NVIDIA drivers.
Generally this is absolutely fine and you won’t have problems, but if you want to exploit the GPU power of your NVIDIA card, e.g. while working on machine or deep learning or for gaming, then it is worthwhile to know some information about your card. You can experience significant improvement in performances.
Although it is technically possible to switch from Nouveau to NVIDIA drivers on a running Linux, in practice it may be a troublesome task. Therefore we should welcome any Linux distro (e.g. ArcoLinux) that drives you through choosing the right driver during the installation process.
The only thing to do is to look for what exact model of NVIDIA card you have (for example I have an NVIDIA Quadro P1000 Mobile).
Then go to this link https://www.nvidia.com/Download/index.aspx, select the options that fits your card, e.g.
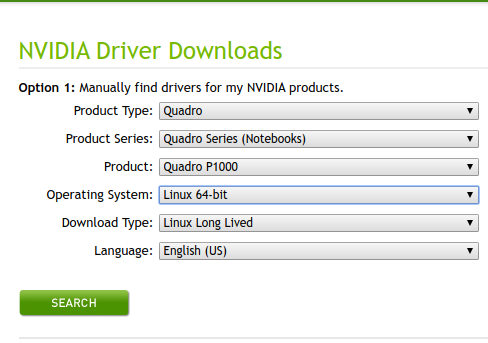
NVIDIA Driver selection
and press Search button and you should see something like this
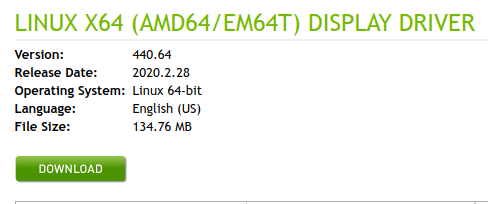
NVIDIA Driver result
from here just keep trace of the Version number (440xx in this case)
Installing ArcoLinux B ISO
You can find the latest ArcoLinux B ISOs here
https://sourceforge.net/projects/arcolinux-community-editions/files
or here
https://bike.seedhost.eu/arcolinux/iso
You can choose any Desktop Environment you prefer, but I strongly suggest you to try Deepin.
So for example at the time of writing this article (late march 2020) you would download this iso
then burn it on a USB pendrive, turn off your system and reboot by activating the boot device selection (press F12 for Dell notebooks)
By doing the previous action you should be able to choose to boot from the USB pendrive.
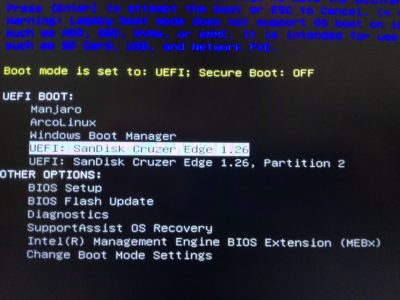
BIOS boot
Please note that the Boot mode is set to UEFI, which matches with the GPT partition system verified above.
The alternative to UEFI is Legacy, which should be the right selection in case the partition system is MBR (instead of GPT), but this is now considered an obsolete choice.
Secure Boot instead should be always OFF.
Anyway, if necessary, either two options can be changed entering the BIOS Setup.
Now choose the USB pendrive and continue. You’ll see the ArcoLinux Installer Welcome screen
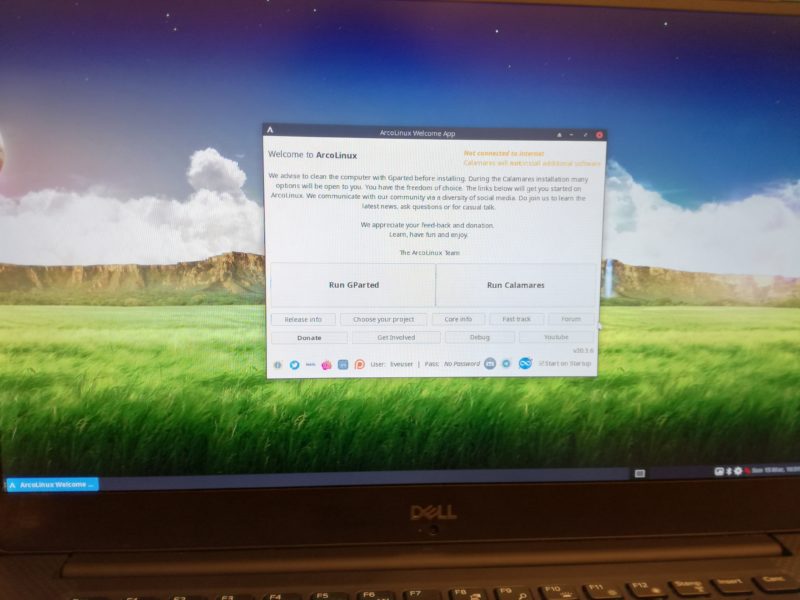
Installer Welcome screen
Now, unless you are already wired connected, you can connect to the wi-fi clicking the red up-down-arrows icon in the bottom-right corner.
Then you can click on Run Calamares (the graphical Arch installer).
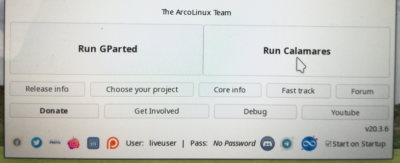
Run Calamares
The first step of Calamares installer is the following
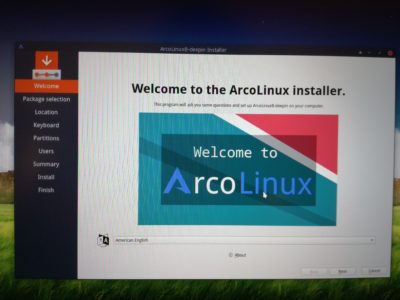
Language choice
where you can choose the system language and press Next.
In the next screen you can customize your installation, by choosing Linux kernel level (latest vs LTS=Long Term Support), video card options (no Nvidia, Nvidia latest, Nvidia LTS, Nvidia version).
In this same screen you can also make a selection of pre-installed packages, but this can be done also later on your running Linux.
Instead, in my experience, you should choose here about Linux kernel level and usage of Nvidia drivers.
Here you can choose regarding your needs, but here is the rule of thumb:
- if you use the system for work and count on stability, go for LTS (Long Term Support): you’ll get slightly older kernel and packages, but your system will be more stable (my choice)
- if you want to experiment the latest things and can accept having to reinstall the system again once in a while, then go for the latest
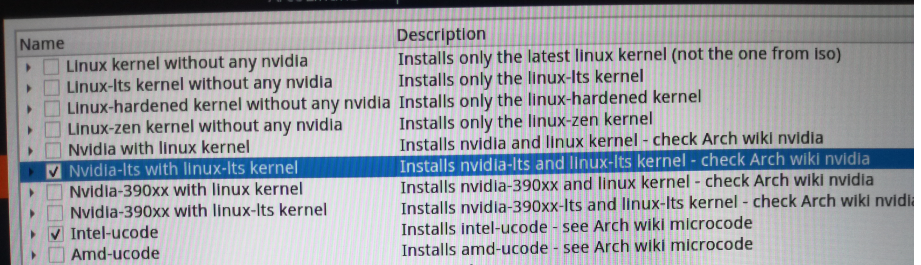
Kernel level & NVIDIA
In case you have an NVIDIA card you should keep into account the version discussed above. Therefore, since in my case NVIDIA site (see above) gave me version 440xx, then I am choosing option Nvidia-lts with linux-lts kernel.
If your card support instead 390xx drivers, then you should go for either Nvidia-390xx with linux kernel or Nvidia-390xx with linux-lts kernel.

Pre-installed packages
Here you can just navigate the tree and select which packages you want pre-installed; some hints:
- Graphics: gimp is always a must, but pinta can also be useful (equivalent of MS Paint)
- Internet: there you can find dropbox and insync (client for many cloud platforms, e.g. Google Drive)
- WPS Office: this is the most MS Office compatible Office suite for Linux (I love LibreOffice, but if you experience compatibility problems with MS Office files, try this)
Ok, now press Next button, choose your time zone and then your keyboard.
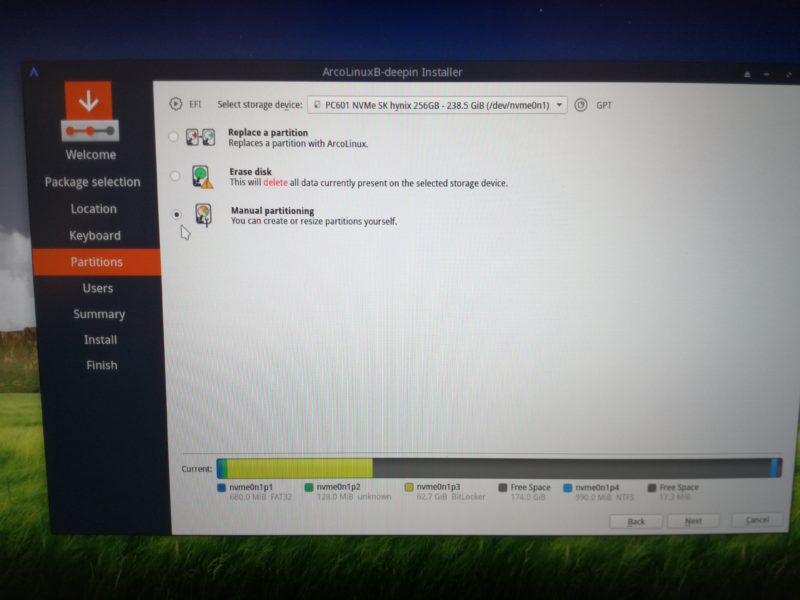
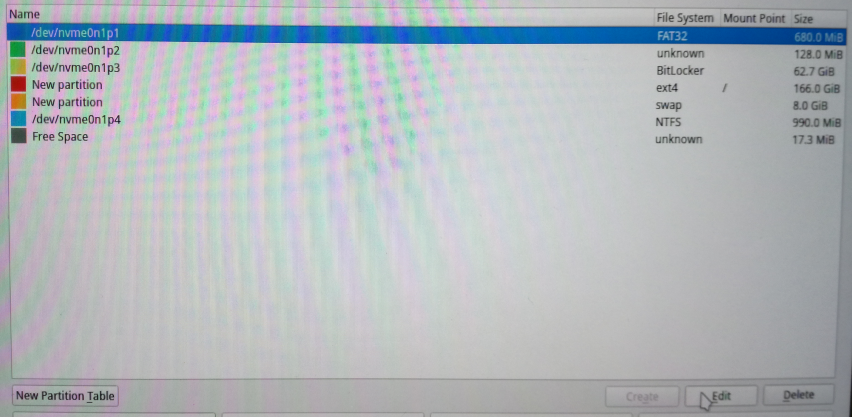
In the next screen you have to choose how to deal with partitions. Note that in my case on the upper left side you see EFI (UEFI) and on the right GPT as partitioning system.
If your partition system is Legacy/MBR you should see BIOS on the left and MBR on the right; moreover, just in this case, you will see on the very bottom of the page, the choice of where (which disk in case of multiple disks) to install the MBR (Master Boot Record).
If you don’t have Windows and therefore don’t want dual boot, then you can go for Erase disk, otherwise choose Manual partitioning.
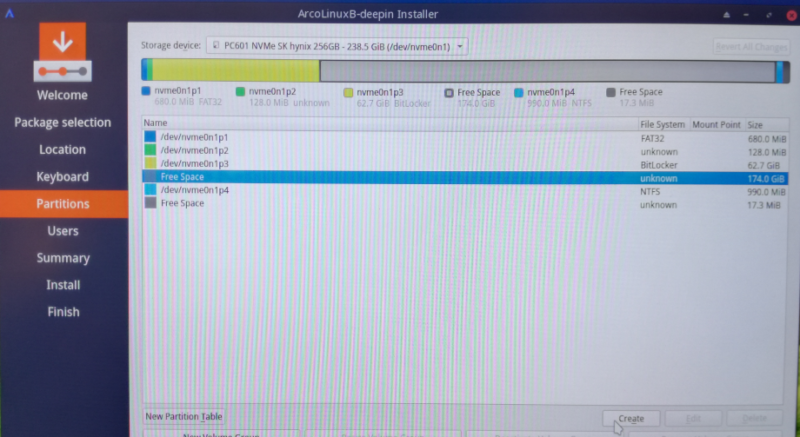
Partitions#1
Select the Free space and click on Create button
Partitions#2
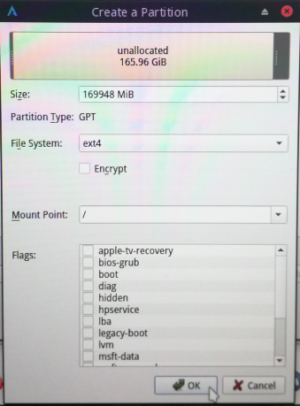
Since I will also create a 8 GB Linux swap partition just after, now I am setting a size of about 166 GB (please note again the GPT Partition Type).
Regarding the File System there are may options, but ext4 is generally a good choice (I also like btrfs, but this choice led to a problem in the final part of a previous installation, so I will stick to ext4).
I will not create multiple partitions (root /, /boot, /home, etc… as you may read in several guides), but just one main partition.
In this case the Mount Point should be /.
No flag is needed, just press OK.
Partitions#3
Since I instead want to create a Linux swap partition I now select again the Free space and click on Create button,
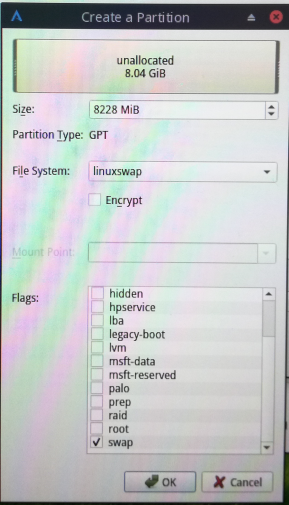
Swap partition
In this case the File System is set to linuxswap and the swap Flag should be selected.
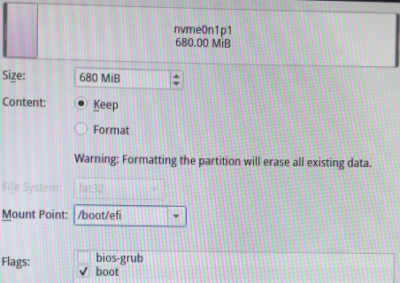
Before moving forward, in case of dual boot with Windows in a UEFI/GPT scenario, it is necessary to make one more thing.
In fact we should Edit the existing EFI Windows partition (see above where we located it while in Windows).
Edit EFI Partition – step 1
set its Mount Point to /boot/efi and check the boot Flag.
Warning: ensure to Keep its content, otherwise you’ll end up with an unbootable system..
Edit EFI Partition – step 2
Now go Next and you will have to set some info about your account
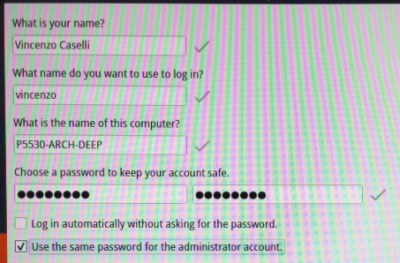
Account info
The last step of Calamares is a summary for a confirm before proceeding
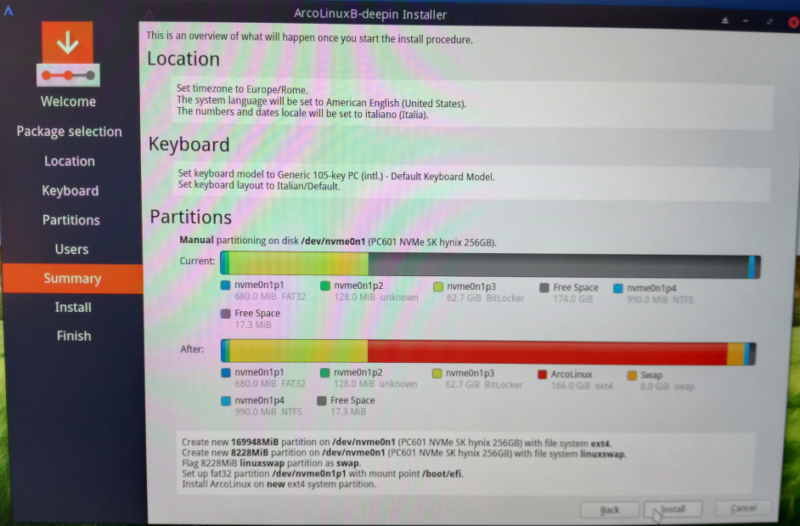
Summary
Just read carefully all the settings: this is the last time we can change something before the disk is phisically written and changed.
All right? Then press Install …
Depending on many factors (hardware and choice of pre-installed packages) the installation process may take a while.
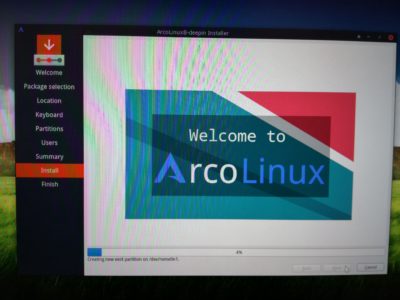
Installing
The process ends with the following screen
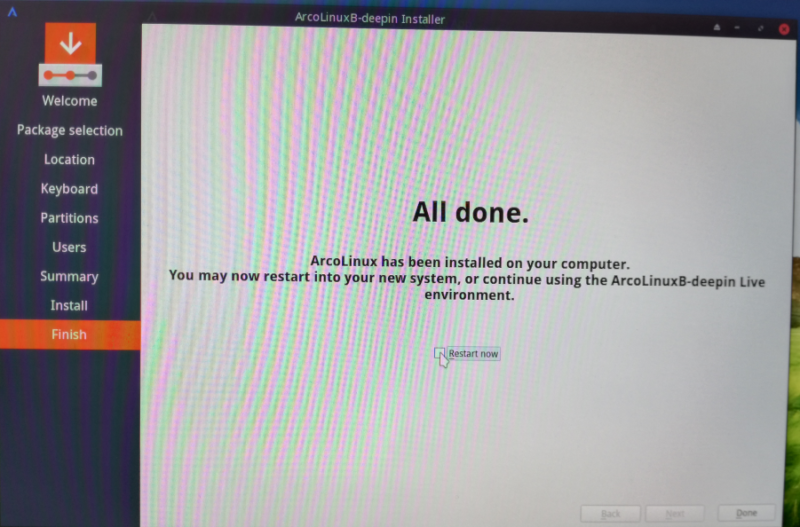
Calamares End
Here I usually (but this is just my way) uncheck Restart, press Done button and shut down the system with right-click on the bottom right corner.
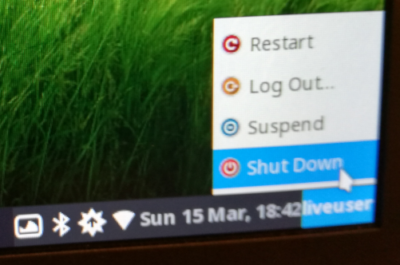
Shutdown
Now when the system shuts down, turn it on.
At boot you should now see a screen that allows you to choose between ArcoLinux (default) and Windows (that’s the dual boot).
The welcome page of ArcoLinux is almost identical the one we saw before at the beginning of the installation process, but now the system is installed and persistent.
Compliments: you have installed ArcoLinux on your system!
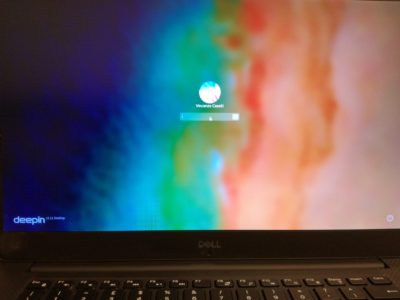
login
Post install setup
Please consider that the following tips just express my personal way to setup ArcoLinux B Deepin; you may take other choices.
Deepin Icon theme
Don’t know why, but ArcoLinux B Deepin comes with an Icon theme different from Deepin. I don’t even remember what’s its name, but I don’t like it very much.
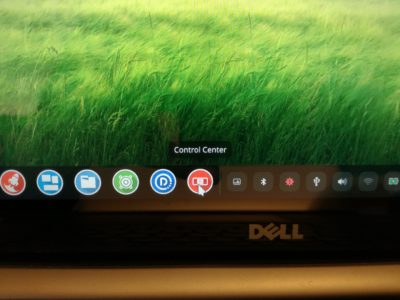
In order to change it, look for the Control Center icon on the bottom taskbar: you’ll see the Control Center menu on the right side of the screen.
Click on Personalization, Theme, scroll down to the Icon Theme section, look for deepin (Default) and click it to make it active (a tick will show up on the right).
Control Center
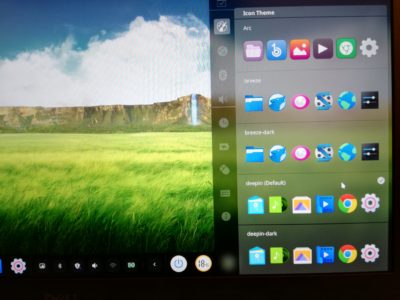
Deepin Icon Theme
Disable sound effects
By default system sound effects are activated: they seems a bit noisy to me, so I always disable them
Disable Sound effect #1
Disable Sound effect #2
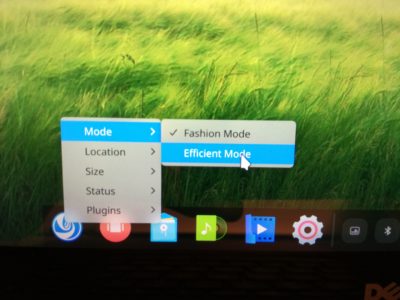
Change system menu style
I also change how the system menu appears by right-clicking on the taskbar, Mode, Efficient Mode
Menu#1
then, when clicking on the bottom-left Deepin icon you’ll see all the installed application available.
There I click on the top-right corner
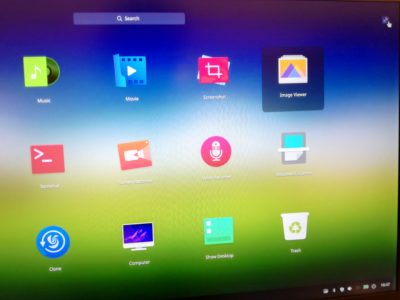
Menu#2
in order to get this look and feel
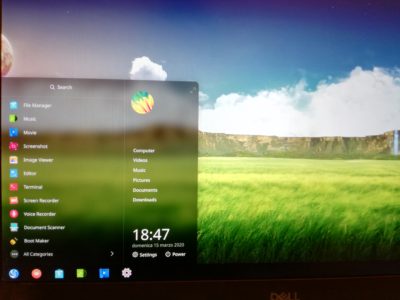
Menu#3
Finding software, send to dock and enable AUR
In order to find and install some software just press Windows key and start typing “software” until you see Software Update
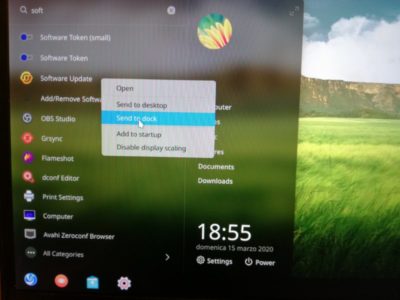
Software
it may be worthwhile to right-click this menu item and select Send to dock: this will copy this item on the dock (the taskbar) so to be at hand next time.
Now click on it to start the Software Update application and from its menu select Preferences
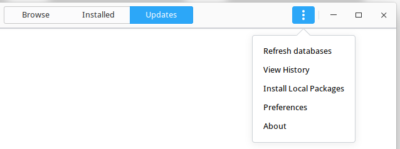
Software-Update-Preferences
and enable AUR if you want to access to a really huge amount of software packages
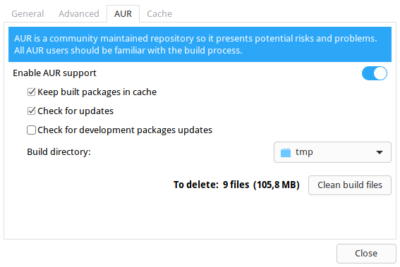
Enable-AUR
Please note that this is the way you will install all your software (forget about downloading .deb or .rpm around on the web like you would do with other Linux distros).
Well, you may want to use the Terminal command line to install new packages, but in every case the above Preferences will anyway drive the process.
Ok, you now have a powerful and beautiful Linux system. Please let me know if you like it and if you hit some problem with it.
Chances are I hit the same problems and got a solution ready to be used.
Hope to help and happy Linux to everyone!
Leave A Comment